We never clean our cleaning tools, right? Come on, admit it. You’re alone, we can’t see you, raise that hand! We know the importance of cleaning and maintaining most stuff, but our cleaning tools are often forgotten.
Just because it is used for cleaning doesn’t mean that it is self-cleaning. In fact, cleaning tools can harbour dirt, bacteria, debris and odours if they are not cared for properly. Also, the better the tools are maintained, the longer they will perform (and the less you need to spend on buying replacements).
We all heave when we think of how long that sponge has been left uncleaned. A dirty mop can re-deposit dirt into your grout and debris can scratch hardwood floors. An improperly maintained vacuum doesn’t suck (and that’s a bad thing). Keep your tools in tip-top shape for the best cleaning results.
I’ll place a guideline for how frequently tools should be cleaned with regular use. When a tool is used to clean something which can lead to cross-contamination, or has been used for a challenging job (where it is very dirty or germy), clean it immediately.
So here’s the quick, no BS way to clean and care for your cleaning tools.
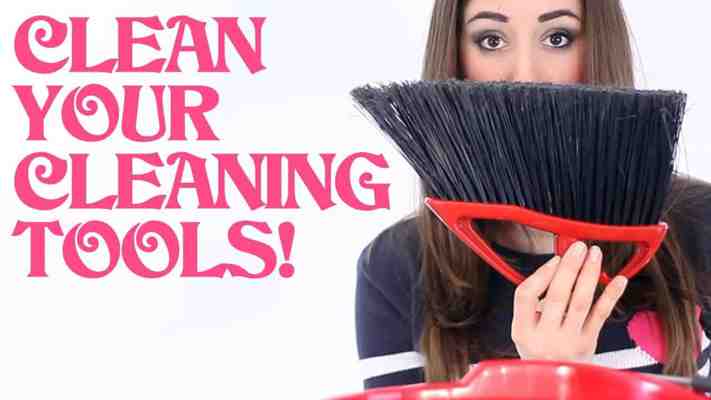
Brushes: scrub brushes, cleaning toothbrushes, toilet bowl brushes.
Easy and simple, cleaning is critical to remove debris caught in bristles and to remove bacteria and dirt. Don a pair of gloves (you may want to use disposable gloves) and pick out any hair or caught debris. You can use an old pen or disposable chopstick for this.
In your bucket or utility sink, fill it with warm water and add 1/2 cup of OXY powder. Stir well to deserve the powder and add your tools. This will not only break the bond between dirt and tool, but it whitens, disinfects (it will kill everything) and deodorizes. This is oxygen bleach and I prefer it to chlorine bleach but some people like to use chlorine bleach. I didn’t tell you to.
Finish off by leaving them to dry, you can hang them from a hook or leave them on an old (read: not special) towel to absorb excess liquid. Brushes should be rinsed after every use and cleaned monthly.
Sponges
My mom used to put sponges in the dishwasher. We did this for years and I came out just fine. There was something unappealing to me about placing a dirty sponge in a dishwasher with dishes, and then the sponge sitting beside dishes…I know many still use this as an option. News flash, if your dishwasher does not have a sanitize cycle, you’re not accomplishing anything.
Another option is to microwave sponges, which can also work but you can also set your house ablaze. So if you are going to do this, make sure the sponge is very wet before microwaving. Microwave it on high heat for a few moments. Then, carefully remove from the microwave perhaps with a pair of salad tongs since it’ll be nuclear hot) and leave it to cool down. DO NOT microwave any sponges with metallic parts or metallic scrub pads. This will cause a FIRE.
If neither of these suit you, consider soaking sponges in a bath of hot water and 1 tablespoon of OXY powder as above. This will allow for debris to soak out and for the sponge to lose some of its discolouration tomato sauce stain). This is the least ‘stressful’ of the 3 options on the sponge and, IMHO, the most effective method. When the water has cooled after 30 minutes or so, rinse it well. Sponges should not stay wet so prop it up and allow for it to dry. Sponges do need to be replaced – especially when the ‘scrubby’ side starts to flatten or ware down. Sponges should be cleaned weekly or more frequently.
Cloths (and not using oil on microfiber)
There are so many kinds of cleaning cloths and you would think laundering them is the solution. Well, it is. But the way they are laundered, especially if they are microfiber cloths, is critical to maintaining the cloth and keeping its electrostatic super powers.
Regular cloths, rags, old teeshirts and towels, cotton cleaning cloths etc. can all be thrown in the laundry and washed on the hottest cycle. I’d say to add in a bit of baking soda (perhaps half a cup) to regular laundry detergent to brighten and deodorize cloths. For really greasy cloths, try washing them with a can of Coke! I use these rags to do greasy, dirty clean ups. I’m never sad to throw one of these cloths away if it is just too dirty and salvaging it is unnecessary.
Microfiber cloths deserve their own paragraph. They are designed to hold an electrostatic charge, therefore if they are washed with any fabric softener (incidentally designed to reduce static cling) or a dryer sheet, you’re in trouble. The strands become clogged and suddenly the cloths don’t dust or buff the way they used to, thy will leave streaks everywhere. They’re garbage. So if you are cleaning these cloths, add a bit of laundry detergent to the wash, and place them in the dryer without anything to dry, or hang them to dry. They can be washed up to 500 times (wowza). I never use these cloths for jobs that are really dirty or greasy, and never to apply any sort of wax, paste or polish. There’s no way to get oil and grease out of these cloths. I like to wash my cloths in a delicates bag if they are being washed with other items to avoid picking up any lint or debris from other items.
Mops and brooms
Mop heads can be laundered in the hottest water you can find and then hung to dry. Before washing, remove any debris or trapped dirt by hand since you want to keep as much of this out of the wash as possible. Use plain detergent and hot water. Add a cup of baking soda if you wish for a wash boost. If you have multiple mop heads, wash each one in an old pair of pantyhose to avoid them getting tangled up. If you have a flat head mop, those pads can be thrown in the wash and treated like a microfiber cloth (since that’s the material that is used). No fabric softener or dryer sheets allowed! Wash your mop monthly.
Brooms heads, no one every thinks about these! You can remove the broom portion from the broom stick if it is threaded and place it in your bucket alongside your cleaning brushes (see above). Special attention should be paid to removing debris ahead of time, brooms are notorious for having tons of tangled up items. People also say to place the broom head in the dishwasher. I’ve done this before but it did deform the broom bristles, so I would not recommend it. Brooms can be cleaned every couple of months. Corn brooms what a witch uses LOL) can be brushed out, I would not recommend getting them wet since the bristles may weaken.
Vacuum
Since every vacuum brand and model are different, I will have to refer you to your vacuum’s own user guide. There are a few good general tips on keeping your vacuum maintained that are worth discussing though.
Emptying the canister on the regular. This is not a storage container, this is a temporary reservoir. Empty it after each use, think of it like flushing a toilet. If you have paper bags, then empty the bag when it is full and replace with a brand new one. If you get a smell coming from your vacuum, it is because your bag is full…and this can eventually ruin your vacuum from overheating it and clogging up the filter. Don’t be that guy.
Washing the filter is also important. Do this every 3 months. It essentially filters out all of the stuff you’re trying to get out of the air. This traps the really fine stuff. Take out the filter, run it under hot water and use a bit of dish soap if you wish. Rinse well until the water runs clear and then leave it to dry for at least 24 hours. If you replace it when it is wet, you’ll wreck your vacuum.
The powerhead can be cleaned by simply using a pair of scissors to cut out string or hair that has inevitably been wrapped around the vacuum’s rotating brushes. We once had a client whose vacuum looked like it just sucked up a wig. We needed the jaws of life to cut the hair out. Woah. Check for hair and strands every month or so.
Cleaning the tools and attachments are fairly simple, wash with soapy water, rinse well and let dry for at least 24 hours before using (they have to be fully dry). You can do this twice a year.
Feather and lambswool dusters
I am not a fan of duster tools but I can respect if you are. Regardless, they need to be cleaned!
So to clean a feather duster, take it outside and shake it, shake it, shake it like a Polaroid picture…come on…come on…ok had to. Ahem. If you have more than just dust caught in it, fill a bucket with warm water and add a couple drops of dish liquid. Dunk the duster in and swish it around. Then, gently wring it out and don’t rip out any feathers) and run under warm water until the water runs clear. Hang it to dry. When it is dry, take your hand and run it through the duster, ruffle it up a bit to fluff it up.
For a lambswool duster, treat is essentially the same way. Take it outside and shake off (spin the handle between the palms of your hand, while the duster is upside down) to shake off any dust. For a more thorough clean, wash as you would for a feather duster. Let it air dry and when it has, pin it between your palms (upside down again) to restore its shape. If you want to restore the natural oils, you can replace the ‘soapy’ water with a teaspoon of vegetable glycerine and wash as suggested above.
Dusting tools can be cleaned every 3-6 months depending on frequency of use.
So now you know. Go ahead and clean, my friends!
AFFILIATE DISCLOSURE: As an Amazon Associate, we may earn commissions from qualifying purchases on